Zoom H4n Pro file recovery after sudden power loss
I’ve been using a Zoom H4n Pro audio recorder for a few years now. I like that it’s durable, relatively inexpensive1 and doesn’t look too fancy. Those last two points are very important when I set it up on the New York City sidewalk across from my bands2 while I’m playing. It doesn’t catch anyone’s eye and if it does it’s easily replacable.
There are a few things I don’t like about it. The rubberized coating gets gross3, the menu system is convoluted, it chews through AA batteries… and if it loses power while recording it loses your files.
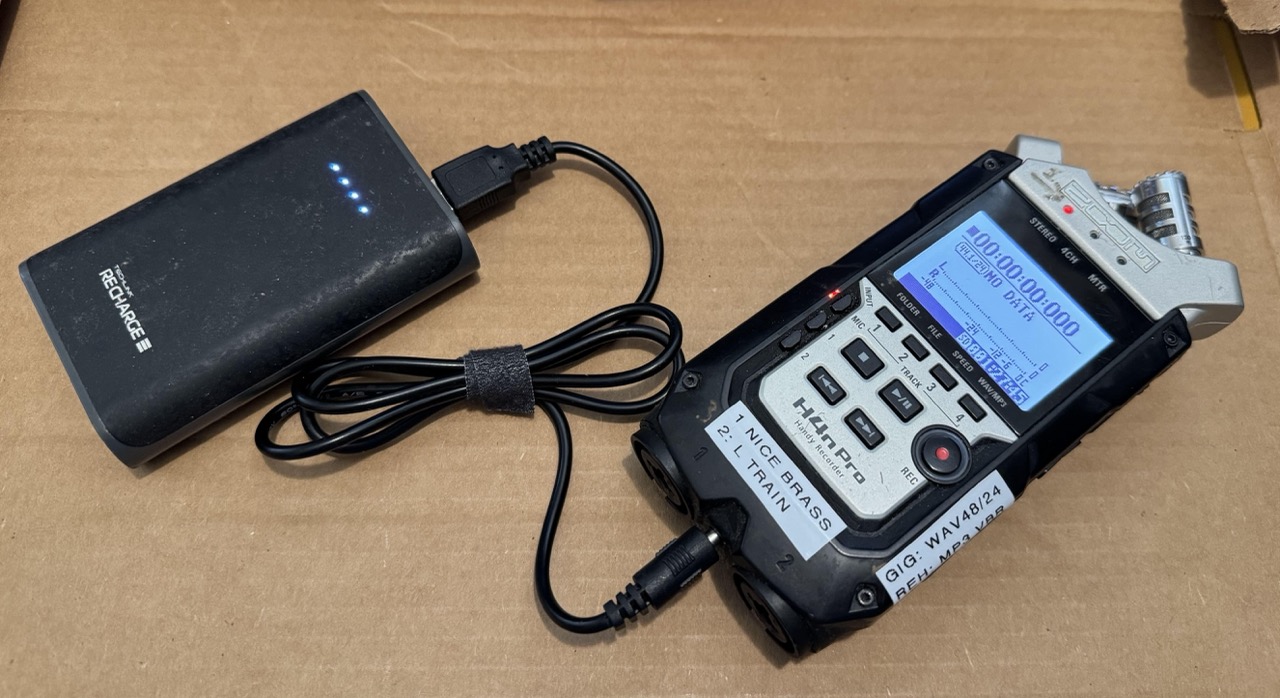
To prevent a power loss I strongly recommend powering it off of a 5V USB port, either from a wall outlet or a rechargable battery pack (Pictured above) with a USB to barrel jack adapter AND with AA batteries in the recorder. The recorder will draw power barrel jack and will fall back to the AA batteries if needed.
If your recorder does lose power while recording your files are probably still recoverable. Here’s how I recovered a 24-bit stereo WAV file recently.
Notes
- Only 1- or 2-channel audio files. For 4 channels read merethan’s guide linked below
- This is for MacOS specifically: The same general process is relevant to Windows and Linux, you will have to figure out a different way to make an image (ISO) out of the SD card
- MacOS Terminal: These instructions assume familiarity with the terminal. If you don’t know what that is or are not comfortable following instructions I recommend asking or paying someone else to do this for you.
- Only for WAV: I do not know if this process will work for variable bit-rate MP3 files. I have only tried with WAV files.
Recovery Process
- THIS IS VERY IMPORTANT: DO NOT SAVE ANYTHING ELSE TO THE SD CARD.
- Connect your sd card directly to your computer.
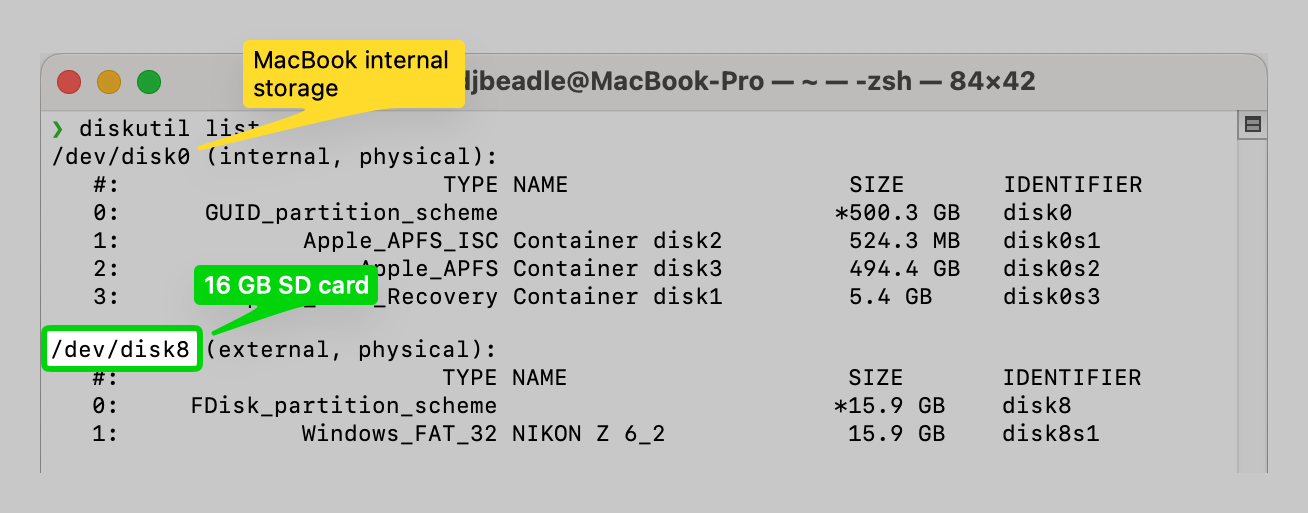
- Identify the path to the device by opening Terminal. On Mac the command is
diskutil list
Look for a path like/dev/disk8with the correct value in the “SIZE” column
-
Create a byte-for-byte replica of your SD Card. This will be exactly the same size as your SD card so make sure you have enough free disk space. Some instructions recommend using Disk Utility but as of MacOS 15.6.1 I couldn’t figure out how to make a full disk image that way.
sudo dd if=/dev/disk8 of=~/Path/to/save/your/sd/card/image/zoom_sd_card.iso bs=512 -
REMOVE THE SD CARD FOR SAFE KEEPING. DO NOT TOUCH IT AGAIN UNTIL YOU HAVE YOUR FILES
-
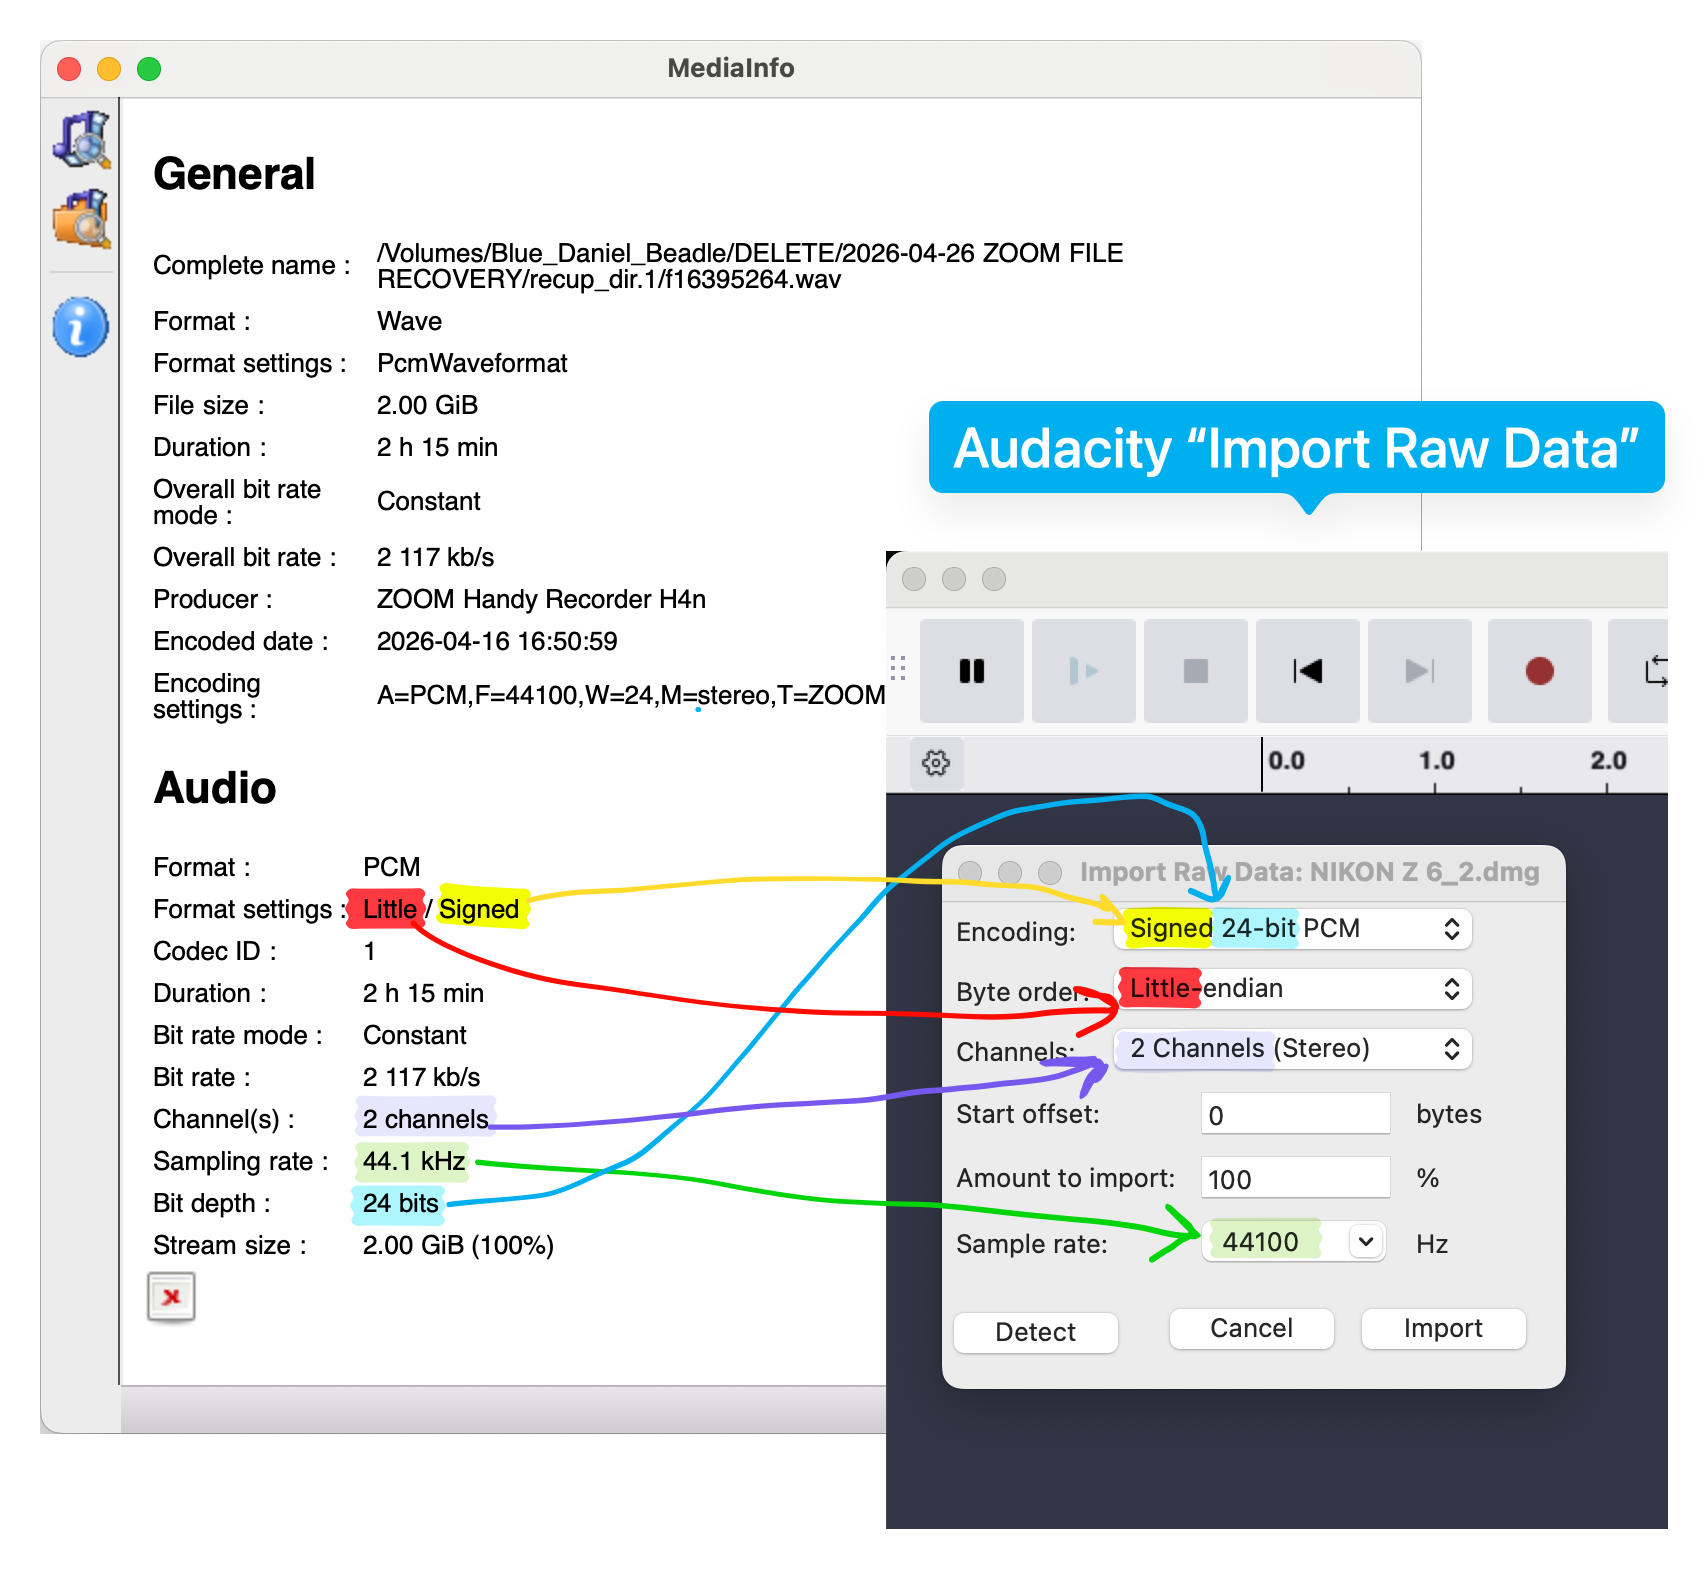
Figure out what your audio recording settings were. If you have another recording you made with the same device with the same settings you can use open it in MediaInfo to see. Look for “Channels”, “bit rate”, and “bit depth”.
If not you can try putting a different SD card in your Zoom and checking the format to see what was selected by default. -
Make sure you have a lot of disk space for Audacity’s temporary files. I needed a full 45 GB free for a 16 GB sd card
-
Open Audacity
-
File > Import > Raw Data…
- Encoding:
Signed ??-bit PCM??is the bit rate you found in step 5 - Byte order: Always “little endian”
- Channels: The number of channels you found in step 5
This guide is only applicable to 1 or 2 channel audio. For 4 channels read merethan’s guide linked below - Start offset: Start with 0, finish the instructions, then come back and try 1, 2, 3, and 910
- Amount to import: If all of your recordings were made with the same settings you can set this to 10% to see the first part of your disk image allowing you to check if you got it correct in Audacity. If your recordings have different settings you’ll just have to use 100% and inspect the disk image manually
- Sample rate: Set this to “bit depth” you detected above. Note that Audacity wants Hz and MediaInfo uses kHz (44,100 Hz = 44.1 kHz)
- Encoding:
- WRITE DOWN WHAT SETTINGS YOU USED
- Press import and get a snack
- Turn down your speakers to a quiet level. There will be loud annoying garbage. Headphones NOT recommended.
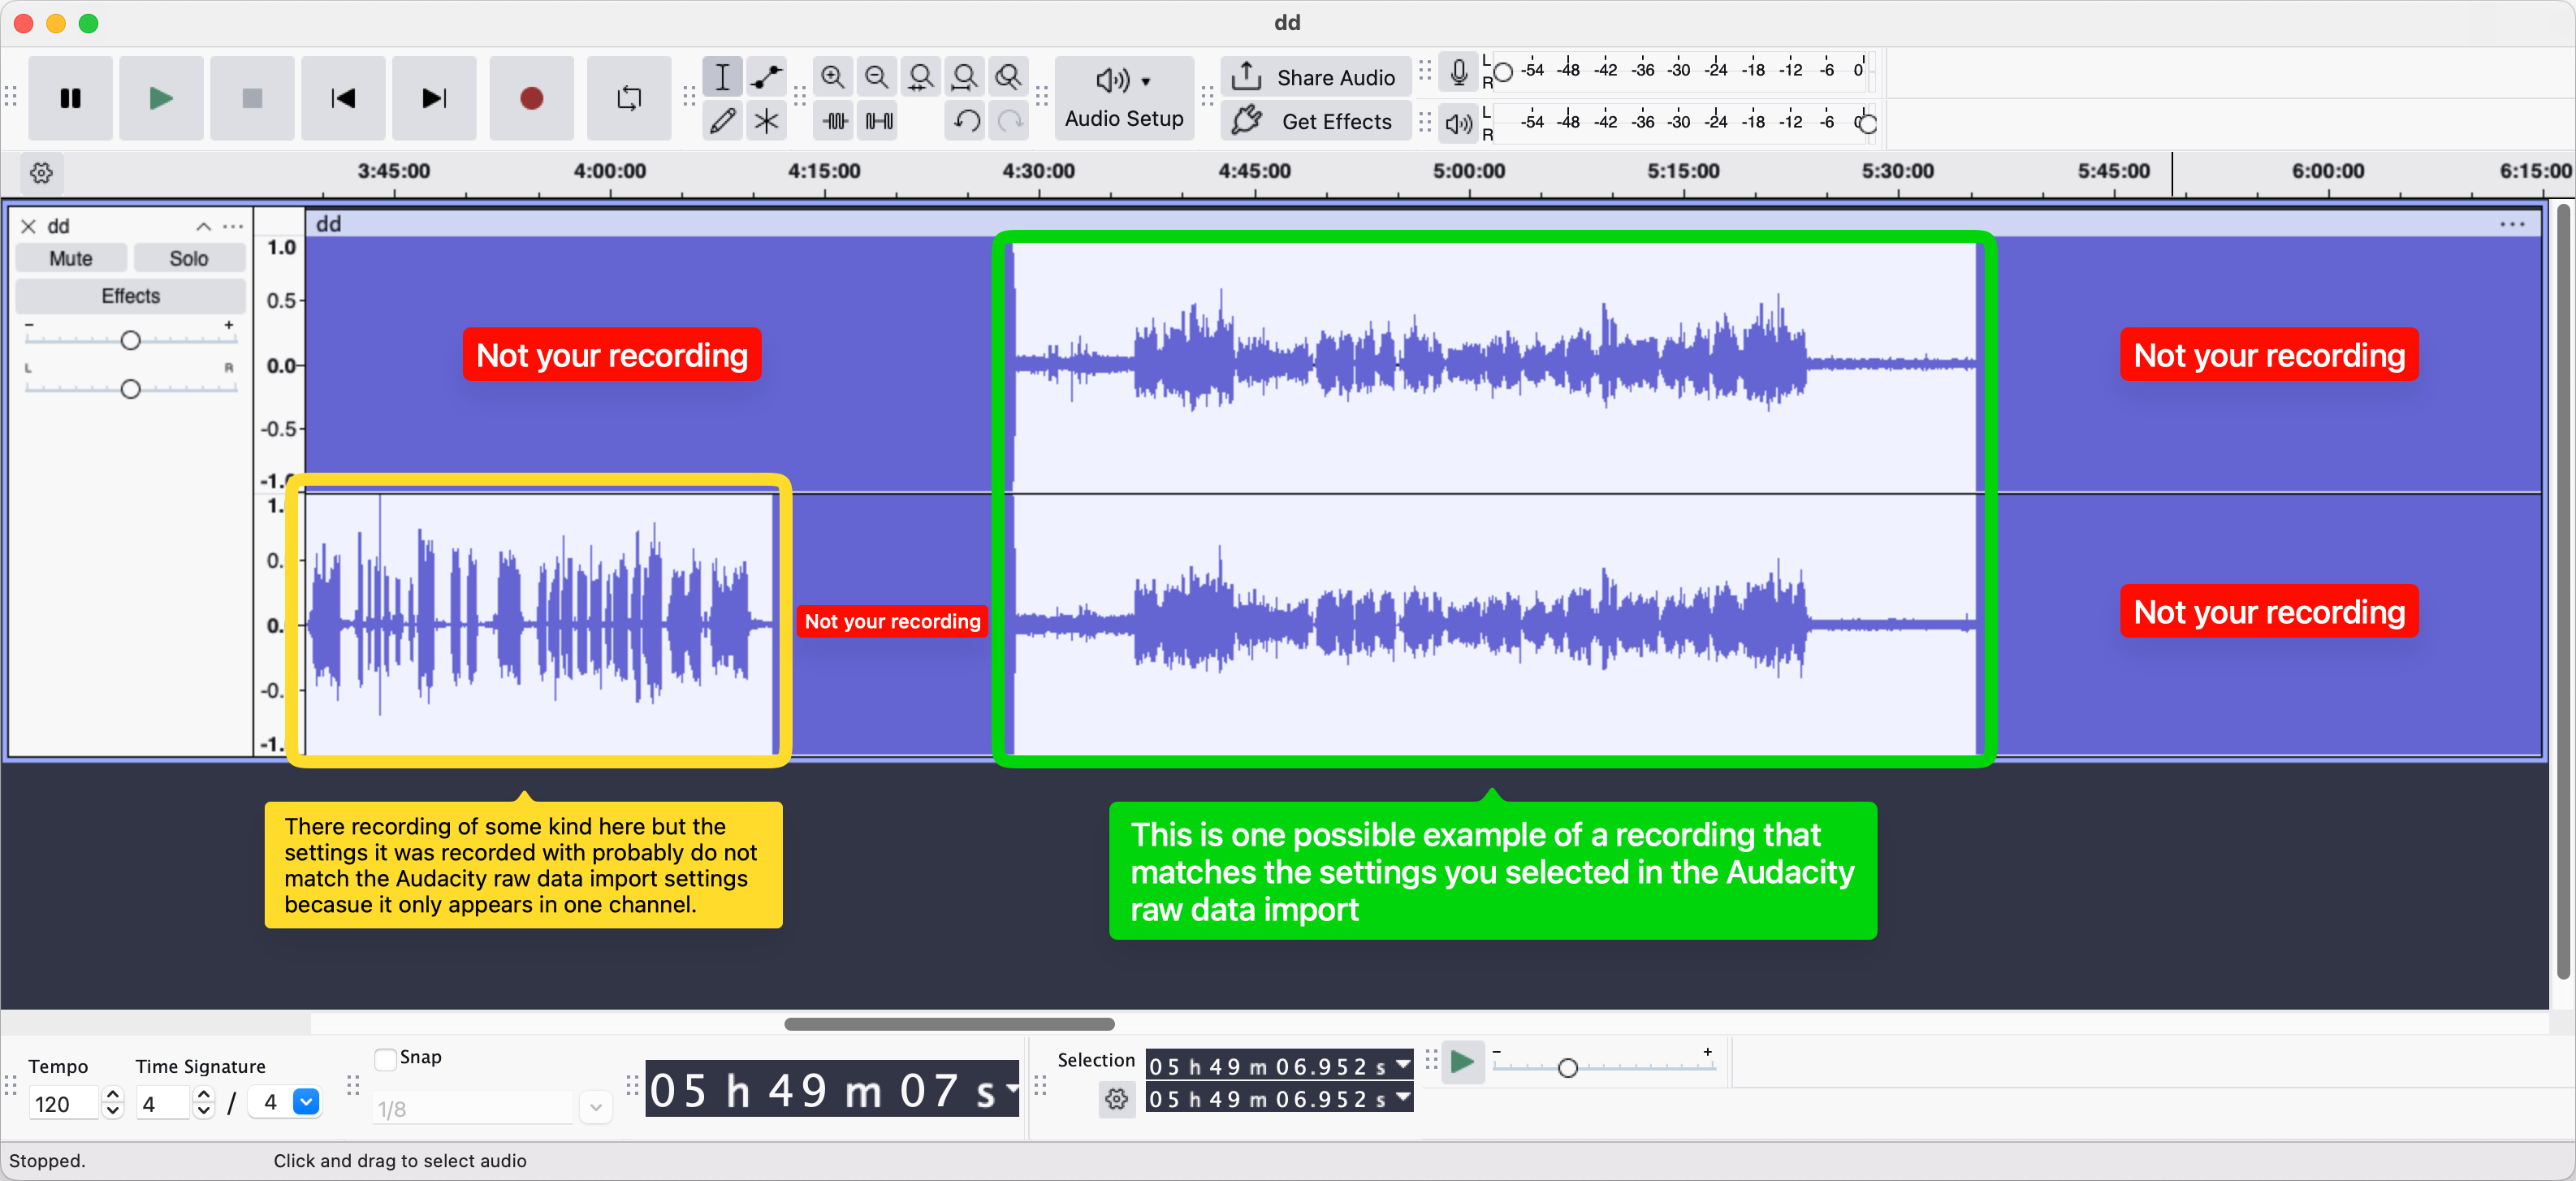
- Look through your file for something that looks like an audio recording. Try playing it. If you find part of your recording select it and export it to a safe spot (NOT YOUR SD CARD. NO WRITING TO THAT!) with the same settings you originally recorded it with. I recommend leaving some wiggle room on either end of the recording that you can trim down later.
NOTE: Your recording might be in a single continous piece or it might be split up.
Stuff that sounds like garbage are non-audio files or audio files that were recorded with different settings.
- Write down what you found with these settings.
- IF YOU DID NOT FIND EVERYTHING DO NOT PANIC.
- Quit Audacity with
Command-Q(⌘Q) - Make sure you have the expected available disk space. If your disk is suddenly full it might be an Audacity recovery file. Delete any large files lingering in
/Users/YOUR_USERNAME/Library/Application Support/Audacity/SessionData
- Quit Audacity with
- Return to step 9 and change the Start offset, then repeat the remaining instructions.
- Once you have found everything you can recombine it
Good luck!!
The following guides were invaluable:
- merethan’s Zoom H4n Recovery Guide: GitHub. Good explination of what is happening at a low level. If you’re trying to recover a 4CH recording you should read this!
- James’ guide Reposted by chris kehnle. The original appears unavailable.
-
~$100 on eBay as of writing ↩︎
-
Nice Brass and the L Train Brass Band ↩︎
-
I used rubbing alcohol to scrape the rubberized coating off ↩︎